The first time I plugged in my Ledger Nano X, I sat there staring at it for a solid ten minutes before I did anything. Not because it was complicated. Because I knew that little device was about to hold something I couldn’t afford to get wrong.
If you’ve just bought yours, or it’s been sitting in a drawer since you ordered it three weeks ago, I understand. Hardware wallets feel intimidating precisely because they matter. But the setup itself is one afternoon, a cup of tea, and about six steps you can’t mess up if you follow them in order.
Here’s exactly how I did mine, and everything I’d tell a friend before she starts.
- Only ever buy a Ledger Nano X directly from Ledger’s official site or an authorised reseller — never a marketplace listing.
- Your 24-word recovery phrase is the real security, not the device itself — write it down, never photograph or type it anywhere.
- Setup takes about 20–30 minutes: unbox, install Ledger Live, create your PIN, write down your recovery phrase, install your first crypto app.
- If you lose the device but still have your recovery phrase, your crypto is safe and recoverable on a new one.
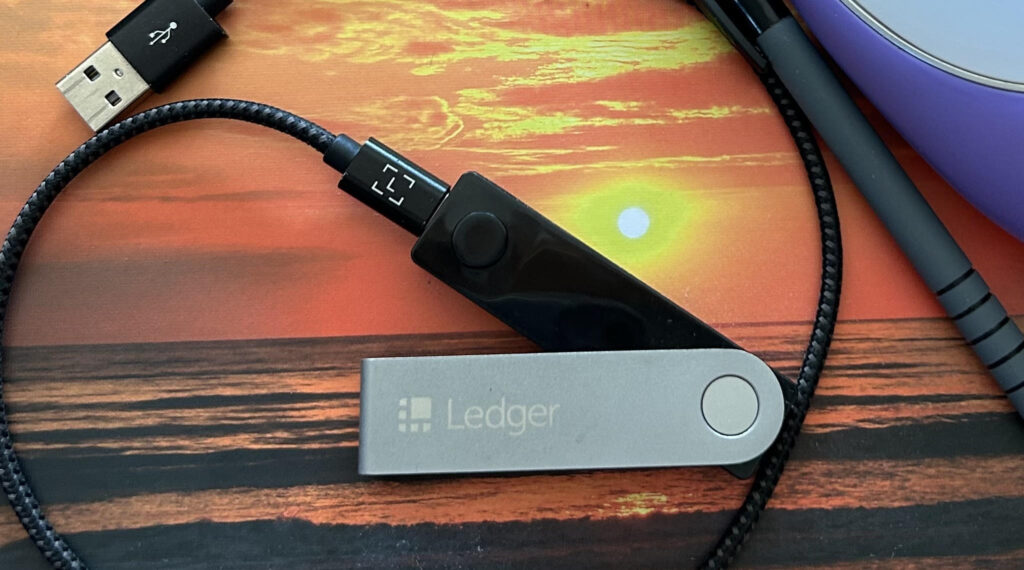
What You’re Actually Setting Up
A Ledger Nano X is a hardware wallet — a small physical device that stores the private keys to your crypto offline, away from your phone, your laptop, and anyone trying to hack either of them. When you buy Bitcoin or Ethereum on an exchange like Binance, it sits on their servers until you move it. Moving it to a Ledger means only you control it. I wrote a full breakdown of why that distinction matters here if you want the background before you dive into setup.
Here’s what’s actually in the box: the Nano X device itself, a USB-C to USB-A cable, a keychain strap, and three recovery phrase sheets. That’s it. No manuals full of jargon, no extra parts to lose.
Step 1: Check the Box Before You Open Anything
Before you even peel the seal, look at the packaging. Ledger uses tamper-evident seals specifically so you can tell if someone got to the device before it reached you. If anything looks off — torn seals, unusual marks, damaged wrapping — contact Ledger support before going any further. Always buy directly from Ledger’s official site or a retailer they list as authorised. This is not the product to save ten euros on a marketplace listing.
Step 2: Download Ledger Live
Ledger Live is the companion app that talks to your device — it’s how you check balances, install crypto apps onto the Nano X, and manage everything. Download it only from Ledger’s official website (ledger.com), never a link from an email or a search ad. Install it on your phone or laptop, whichever you’ll use most.
This Is the Wallet I Use to Keep My Bitcoin Safe.
Get My Ledger Now →Step 3: Turn On Your Device and Set a PIN
Press the button on the Nano X to turn it on. It will walk you through choosing a PIN code — pick something 4 to 8 digits long that you’ll actually remember, but that no one could guess from your birthday or address. This PIN is what stops someone from using the physical device even if they steal it.
Step 4: Write Down Your Recovery Phrase (This Is the Part That Matters Most)

The device will generate a 24-word recovery phrase. This is the single most important part of the entire setup. This phrase — not the device, not the PIN — is what actually controls your crypto. Anyone who has these 24 words can access everything, with or without the physical Nano X.
So here’s what I do, and what I’d tell you to do:
- Write it by hand on the paper sheets that came in the box, or better, on a metal backup plate if you’re storing meaningful value.
- Never type it into a phone, a laptop, a password manager, or a photo. Not even a private note. If it touches the internet at any point, it’s compromised.
- Store it somewhere only you know — not in the same place as the device itself.
- Never share it with anyone, including someone claiming to be Ledger support. Ledger will never ask for it.
Step 5: Install Your First Crypto App
Inside Ledger Live, go to the Manager section and install the app for whichever coin you’re planning to hold — Bitcoin and Ethereum are the two most people start with. This installs a small piece of software onto the Nano X itself that lets it recognise and manage that specific cryptocurrency.

Step 6: Move Your Crypto Across
Once your app is installed, go to the Receive tab in Ledger Live, generate your Ledger’s receiving address, and send your crypto to it from wherever it currently lives — usually an exchange. I’ve got a full walkthrough on withdrawing from an exchange to a wallet if this is your first time doing it. Double-check the address matches on both your screen and the device itself before confirming — this is the one step people rush and shouldn’t.
New articles, straight to your inbox.
Whether you’re just curious or already investing, you belong here.
Join HereWhy I Trust the Nano X Specifically

There are a few hardware wallets on the market, and I’ve compared them properly here if you’re still deciding. What sold me on the Nano X specifically was the Bluetooth connectivity for managing it from my phone without a cable, the larger screen that actually lets me read and verify addresses properly, and the battery that means I’m not tethered to a laptop every time I want to check something. For anyone managing crypto day to day rather than only ever buying and forgetting, that convenience matters.
Frequently Asked Questions
Is the Ledger Nano X actually safe? Yes — the private keys never leave the physical device, even when connected to a computer or phone. The only real risk is human: losing your recovery phrase, sharing it, or buying from an unofficial seller.
What happens if I lose my Nano X? Nothing happens to your crypto. As long as you still have your 24-word recovery phrase, you can restore everything onto a new device. This is exactly why the phrase matters more than the device itself.
Do I need a Nano X specifically, or would a cheaper model work? The Nano S Plus is a solid, cheaper option if you don’t need Bluetooth or a larger screen. I use the Nano X because I manage things from my phone regularly, but either device secures your crypto the same way at the core.

Can I set this up without any crypto experience? Yes. The steps above are the whole process — there’s no coding, no technical background needed. If you can follow a recipe, you can set up a Ledger.
How much does a Ledger Nano X cost? Pricing is set on Ledger’s official site and changes periodically, so I’d check there directly rather than trust a number here that might be out of date.
Should I buy crypto first or set up my Ledger first? Either order works. Some people set up the Ledger first so it’s ready the moment they buy; others buy on an exchange first and transfer once the Ledger’s ready. I’d set up the Ledger first — it removes the temptation to leave crypto sitting on an exchange “just for now.”
Have a question I didn’t cover? Leave it in the comments below — I read every one.
Not Sure Where to Start? Grab My Free Crypto Starter Guide.
Get the Guide Now →Sources
Ledger — Official Support Documentation
This article contains affiliate links. If you purchase a Ledger through my link, I may earn a small commission at no extra cost to you. I only recommend products I use and trust myself. This is not financial advice — always do your own research before investing.

Written by Yana Ballantyne
Founder of Yadala · Crypto Educator · Swiss Real Estate Advisor
Yana is a German-born, Australia-raised investor with two decades of experience across property, shares and crypto. She founded Yadala to make crypto simple and accessible for women — without the jargon or the overwhelm. She recommends platforms she believes in but will never tell you which coin to buy. That decision is always yours. Want to talk through your situation? Reach her through the Contact page.

Disclaimer & Affiliate Disclosure
This article contains affiliate links. If you purchase through these links, I may earn a small commission at no extra cost to you. I only recommend products and services I personally use and genuinely believe in. Your support helps me keep Yadala running and free to read — thank you.
The content on Yadala is for informational and educational purposes only. Nothing here constitutes financial, investment, or legal advice. I am not a licensed financial advisor. All opinions expressed are my own personal views based on my own research at the time of writing.
Cryptocurrency and Bitcoin investments are highly volatile and speculative. The value of digital assets can rise and fall dramatically, and you could lose your entire investment. Regulatory changes may also significantly impact the value or legality of cryptocurrency in your country. Never invest more than you can afford to lose completely.
Yadala and its author accept no liability for any financial loss or damage arising from decisions made based on information in this article. Always conduct your own research and consult a qualified financial advisor before making any investment decisions.